
Calculate the maximum battery charge-time for any re-chargeable battery, based on the information entered using a constant current power supply.
To convert the decimal time above to Hours, Minutes and Seconds (HMS) use the calculator below:
 With the advent and refinement of electric powered foam (polystyrene) planes it has become easy to teach yourself to fly R/C. Electric powered foam planes fly relatively slowly (5 to 18 km/h) leaving you with some time to check and respond to the controls on your transmitter and to check wind direction when getting ready to land.
The easiest plane to start with is a Piper J3 or equivalent plane.
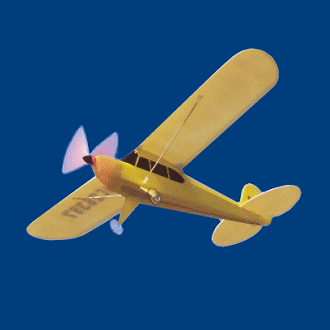
I taught myself to fly with a PICO J3-F manufactured by Taiwan based company, Grand Wing Servo-Tech Co., Ltd. (GWS). The PICO J3-F is made of foam and is powered by a single electric motor (IPS - Indoor Power System) mounted in the nose cone. The main wing is covered in a thin film of plastic, which makes it strong and virtually unbreakable.
Note: Although the standard power system and propeller of the GWS PICO J3-F cater for indoor flying the plane does fly well outdoors on a calm day - fitting a EP-9070 propeller and heat sink on the motor "converts" it to an outdoor flier with faster speed.
I waited for a very calm day before attempting to fly. I found even a slight breeze can make it difficult to control the plane during take-off and landing.
Before powering up and flying, check that the control surfaces move in the direction of the corresponding joystick movements on the transmitter. Also do a range check to verify that your plane will remain under your control when in the air and flying in the area planned.
Point your plane in the direction from which the wind is blowing, i.e. face the wind head-on standing behind your plane. Power-up the motor gradually to full speed. Once the correct speed is reached the planes tail will lift. Pull the elevator/rudder joystick back slowly. The plane will leave the ground. Once your plane is about two to three meters above the ground push the elevator/rudder stick slowly into the right or left direction (small movements are sufficient). Should the plane lose height during a turn simply pull the elevator/rudder stick slightly back to gain height while in the turn.
A method of finding out how a plane responds to your controls is to tap the elevator/rudder joystick in the direction you would like your plane to fly. This gives the plane a chance to stabilize and for the joystick to return to its centre position.
To land, turn your plane so that it is flying into the wind. Level out and start decreasing throttle gradually at about one meter above the ground. The airspeed of the plane will decrease and it will descend. Keep the plane relatively level during the decent. cut the power to the motor when the plane is about to touch the ground. The plane will glide, touch down and stop.
PS: Make sure there are no people, animals or road/air traffic in the area you intend flying.
Antenna's